
Touring Guitarist’s Amp Care Routine: A Guide to Keeping Your Gear in Top Shape
The Ultimate Amp Care Guide for Touring Guitarists
Proper care and maintenance of your amplifier is essential for any touring guitarist. Not only will it keep your amp running reliably, but it will also help to maintain its sound quality and extend its lifespan.
This guide will provide you with a comprehensive routine for caring for your amp, including daily, weekly, monthly, and seasonal maintenance tasks. We’ll also provide you with some additional tips for troubleshooting common amp problems and extending the lifespan of your amplifier.
So whether you’re just starting out on your touring career or you’re a seasoned pro, read on to learn how to keep your amp in top shape.
1. The Importance of Amp Care for Touring Guitarists
As a touring guitarist, your amplifier is one of your most important pieces of equipment. It’s what amplifies your sound and allows you to be heard by your audience. That’s why it’s so important to take good care of your amp and to make sure that it’s always in good working condition.
Proper amp care can help to ensure the reliability of your amp, so that you can count on it to perform night after night. It can also help to maintain the sound quality of your amp, so that you can always sound your best. And finally, proper amp care can help to extend the lifespan of your amp, so that you can keep it for many years to come.
So if you’re a touring guitarist, make sure to follow the amp care routine outlined in this guide. It will help you to keep your amp in top shape and ensure that you always sound your best.
Preventing Malfunctions and Breakdowns
Regular maintenance and care can help to minimize the risk of costly repairs and performance interruptions. Here are a few tips:
- Keep your amp clean. Dust and dirt can build up on the exterior of your amp, and this can lead to overheating and other problems. Make sure to regularly clean the exterior of your amp with a soft, dry cloth.
- Inspect your amp regularly. Take a few minutes before each show to inspect your amp for any signs of damage. Look for loose wires, frayed cables, or any other potential problems.
- Have your amp serviced regularly. Even if your amp is in good condition, it’s a good idea to have it serviced by a qualified technician once a year. This will help to identify and fix any potential problems before they become major issues.
By following these simple tips, you can help to prevent malfunctions and breakdowns and keep your amp running smoothly for years to come.
Maintaining Optimal Sound Quality
Proper amp care can also help to maintain the optimal sound quality of your amplifier. Here are a few tips:
- Use the right cables. The cables that you use to connect your guitar to your amp can have a significant impact on the sound quality. Make sure to use high-quality cables that are designed for guitar use.
- Keep your amp at a reasonable volume. Playing your amp at excessively high volumes can damage the speakers and other components. Make sure to keep your amp at a reasonable volume, especially if you’re playing in a small room.
- Don’t overdrive your amp. Overdriving your amp can also damage the speakers and other components. Make sure to use the gain and volume controls on your amp to achieve the desired sound without overdriving the amp.
By following these simple tips, you can help to maintain the optimal sound quality of your amplifier and ensure that you always sound your best.
Extending the Lifespan of Your Amp
Regular care and maintenance can also help to extend the lifespan of your amplifier. Here are a few tips:
- Store your amp in a cool, dry place. When you’re not using your amp, store it in a cool, dry place. Avoid storing your amp in direct sunlight or in a humid environment.
- Cover your amp when not in use. When you’re not using your amp, cover it with a dust cover. This will help to protect the amp from dust and dirt.
- Handle your amp with care. When you’re transporting your amp, be sure to handle it with care. Avoid dropping or bumping the amp, as this can damage the components.
By following these simple tips, you can help to extend the lifespan of your amplifier and protect your investment.
2. Daily Care Routine for Touring Guitarists

Daily Care Routine for Touring Guitarists
As a touring guitarist, it’s important to have a daily care routine for your amplifier to ensure that it’s always in good working condition. Here’s a step-by-step guide to help you get started:
1. Visual Inspection
Before each show, take a few minutes to visually inspect your amp for any signs of damage. Look for loose wires, frayed cables, or any other potential problems. If you find any damage, be sure to address it before using the amp.
2. Cleaning the Exterior
Use a soft, dry cloth to clean the exterior of your amp. This will help to remove dust and dirt, which can build up over time and lead to problems. Be sure to avoid using any harsh chemicals or cleaners, as these could damage the finish of your amp.
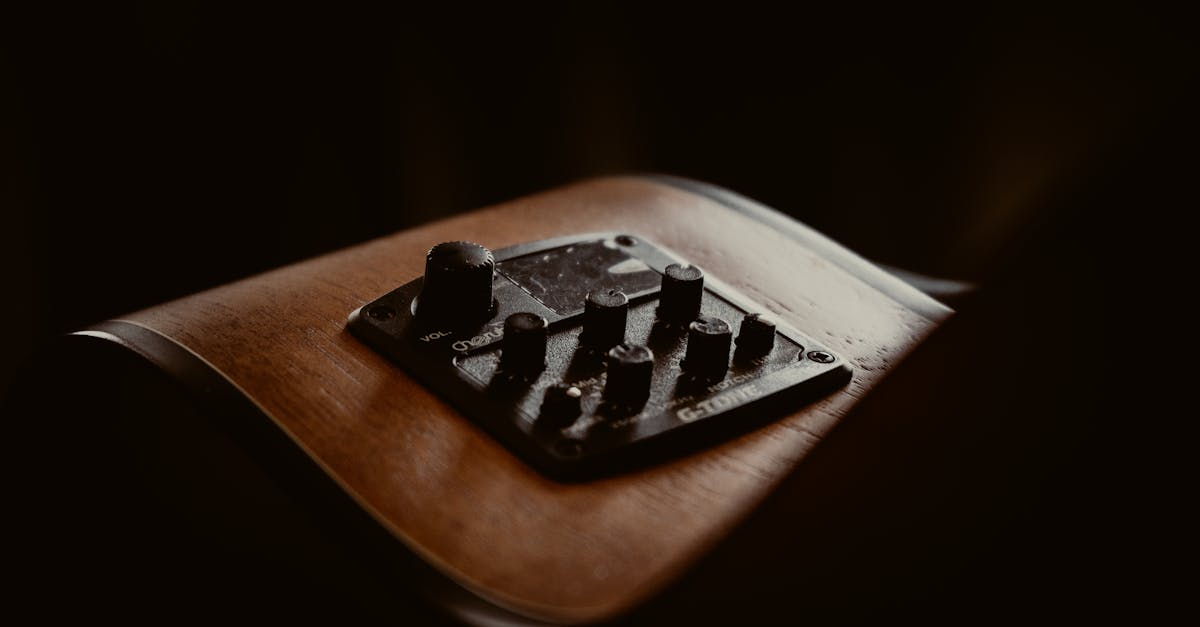
3. Checking Cables and Connections
Take a few minutes to check all of the cables and connections on your amp. Make sure that all of the cables are securely plugged in and that there are no loose connections. Loose connections can cause intermittent problems, so it’s important to make sure that everything is tight and secure.
Visual Inspection
Visual Inspection
Before each show, take a few minutes to visually inspect your amp for any signs of damage. Look for loose wires, frayed cables, or any other potential problems. If you find any damage, be sure to address it before using the amp.
Here are some specific things to look for during your visual inspection:
- Loose wires: Check all of the wires and cables on your amp to make sure that they are securely plugged in. Loose wires can cause intermittent problems, so it’s important to make sure that everything is tight and secure.
- Frayed cables: Inspect all of the cables on your amp for any signs of fraying. Frayed cables can cause shorts, so it’s important to replace them as soon as possible.
- Damaged components: Look for any signs of damage to the components on your amp, such as cracked or broken knobs, switches, or jacks. If you find any damaged components, be sure to have them repaired or replaced before using the amp.
By performing a visual inspection of your amp before each show, you can help to prevent problems and keep your amp running smoothly.
Cleaning the Exterior
Cleaning the Exterior
Use a soft, dry cloth to clean the exterior of your amp. This will help to remove dust and dirt, which can build up over time and lead to problems. Be sure to avoid using any harsh chemicals or cleaners, as these could damage the finish of your amp.
Here are some specific instructions for cleaning the exterior of your amp:
- Unplug your amp from the power outlet. This is important for safety reasons, as you don’t want to risk getting shocked while you’re cleaning your amp.
- Use a soft, dry cloth to wipe down the exterior of your amp. Be sure to get all of the surfaces, including the top, bottom, sides, and back. If there is any stubborn dirt or grime, you can use a slightly damp cloth to remove it. However, be sure to wring out the cloth thoroughly before wiping down your amp, as you don’t want to get any water inside the amp.
- Allow your amp to dry completely before plugging it back in. This will help to prevent any electrical problems.
Checking Cables and Connections
Checking Cables and Connections
Take a few minutes to check all of the cables and connections on your amp. Make sure that all of the cables are securely plugged in and that there are no loose connections. Loose connections can cause intermittent problems, so it’s important to make sure that everything is tight and secure.
Here are some specific things to look for when checking your cables and connections:
- Loose cables: Make sure that all of the cables on your amp are securely plugged in. This includes the power cable, the speaker cable, and any other cables that you may be using. Loose cables can cause intermittent problems, so it’s important to make sure that everything is tight and secure.
- Frayed cables: Inspect all of the cables on your amp for any signs of fraying. Frayed cables can cause shorts, so it’s important to replace them as soon as possible.
- Dirty connectors: Dirty connectors can also cause intermittent problems. To clean a dirty connector, simply use a cotton swab dipped in rubbing alcohol to wipe away any dirt or debris.
By regularly checking your cables and connections, you can help to prevent problems and keep your amp running smoothly.
3. Weekly and Monthly Maintenance Tasks
Weekly and Monthly Maintenance Tasks
In addition to your daily care routine, there are a few weekly and monthly maintenance tasks that you should perform to keep your amp in top condition. Here’s a checklist:
Weekly Tasks:
- Vacuum the amp. Use a vacuum cleaner to remove dust and debris from the interior of your amp. This will help to prevent overheating and other problems.
- Clean the input jacks. Use a cotton swab dipped in rubbing alcohol to clean the input jacks on your amp. This will help to prevent crackling noises and ensure a strong signal connection.
Monthly Tasks:
- Check the vacuum tubes (for tube amps only). If you have a tube amp, you should check the vacuum tubes once a month to make sure that they are still functioning properly. Replace any tubes that are burned out or damaged.
- Tighten the screws and bolts. Over time, the screws and bolts on your amp can become loose. Tighten all of the screws and bolts to ensure that your amp is secure and stable.
Vacuuming the Amp
Vacuuming the Amp
Vacuuming your amp is an important part of regular maintenance. Dust and debris can build up inside your amp over time, which can lead to overheating and other problems. Vacuuming your amp will help to remove this dust and debris and keep your amp running smoothly.
Here are some specific benefits of vacuuming your amp:
- Prevents overheating. Dust and debris can build up on the components inside your amp, which can restrict airflow and cause the amp to overheat. Vacuuming your amp will help to remove this dust and debris and prevent overheating.
- Reduces noise. Dust and debris can also cause noise problems, such as crackling and popping sounds. Vacuuming your amp will help to remove this dust and debris and reduce noise.
- Extends the life of your amp. By vacuuming your amp regularly, you can help to extend the life of your amp. Dust and debris can cause damage to the components inside your amp, which can shorten the lifespan of your amp.
To vacuum your amp, simply use a vacuum cleaner with a soft brush attachment. Be sure to vacuum all of the surfaces inside your amp, including the top, bottom, sides, and back. You should also vacuum the input and output jacks.
Cleaning the Input Jacks
Cleaning the Input Jacks
Dirty input jacks can cause crackling noises and intermittent signal loss. To clean the input jacks on your amp, you will need a cotton swab and some rubbing alcohol.
Here are the steps on how to clean the input jacks on your amp:
- Unplug your amp from the power outlet. This is important for safety reasons, as you don’t want to risk getting shocked while you’re cleaning your amp.
- Dip a cotton swab in rubbing alcohol.
- Gently swab the inside of the input jack. Be sure to get all of the surfaces, including the contacts.
- Allow the input jack to dry completely before plugging in your guitar.
By cleaning the input jacks on your amp regularly, you can help to minimize crackling noises and ensure a strong signal connection.
Checking Tube Amps (for Tube Amps Only)
Checking Tube Amps (for Tube Amps Only)
If you have a tube amp, it’s important to check the vacuum tubes regularly to make sure that they are still functioning properly. Vacuum tubes can wear out over time, and a bad vacuum tube can cause a variety of problems, such as reduced volume, distorted sound, and even complete failure of the amp.
Here are some signs that a vacuum tube may be bad:
- Reduced volume. If you notice that your amp is not producing as much volume as it used to, it could be a sign that one or more of the vacuum tubes is bad.
- Distorted sound. A bad vacuum tube can also cause the sound of your amp to become distorted. This is especially noticeable when playing at high volumes.
- Complete failure of the amp. In some cases, a bad vacuum tube can cause the amp to completely fail. If your amp suddenly stops working, it’s possible that one or more of the vacuum tubes has blown.
To check the vacuum tubes in your amp, you will need a vacuum tube tester. A vacuum tube tester is a device that can test the condition of vacuum tubes and identify any that are bad.
Once you have a vacuum tube tester, simply follow the instructions on the tester to test the vacuum tubes in your amp. If any of the vacuum tubes test bad, you will need to replace them with new ones.
Replacing vacuum tubes is a relatively simple process, but it’s important to be careful. Vacuum tubes can be fragile, and if you’re not careful, you could damage the tube or the amp.
Here are the steps on how to replace a vacuum tube:
- Unplug your amp from the power outlet. This is important for safety reasons, as you don’t want to risk getting shocked while you’re working on your amp.
- Let the amp cool down. Vacuum tubes can get very hot, so it’s important to let the amp cool down before you start working on it.
- Locate the vacuum tube that you need to replace. The vacuum tubes in your amp will be located in a metal cage or chassis. Simply remove the screws that hold the cage or chassis in place and you will be able to access the vacuum tubes.
- Carefully remove the old vacuum tube. Be careful not to touch the glass envelope of the vacuum tube, as this can damage the tube.
- Insert the new vacuum tube. Be sure to insert the new vacuum tube in the correct orientation. The pins on the vacuum tube should line up with the holes in the socket.
- Reattach the cage or chassis. Once you have inserted the new vacuum tube, reattach the cage or chassis and tighten the screws.
- Plug your amp back into the power outlet and turn it on. Your amp should now be working properly.
4. Seasonal Maintenance for Touring Guitarists

Seasonal Maintenance for Touring Guitarists
As a touring guitarist, it’s important to be aware of the different climates and conditions that you may encounter on the road. Extreme heat, cold, and humidity can all take a toll on your amp, so it’s important to take steps to protect it.
Here are some seasonal maintenance tasks that you should perform to keep your amp in top condition:
Summer Maintenance
- Protect your amp from heat. Heat can damage the components inside your amp, so it’s important to protect it from the sun and other sources of heat. If you’re playing outdoors, try to keep your amp in the shade as much as possible. You can also use a fan to keep your amp cool.
- Keep your amp dry. Humidity can damage the components inside your amp, so it’s important to keep it dry. If you’re playing in a humid environment, try to keep your amp in a dry place. You can also use a dehumidifier to remove moisture from the air.
Winter Maintenance
- Protect your amp from cold. Cold temperatures can damage the components inside your amp, so it’s important to protect it from the cold. If you’re playing outdoors, try to keep your amp in a warm place. You can also use a heater to keep your amp warm.
- Prevent condensation. When you bring your amp from a cold environment into a warm environment, condensation can form on the inside of the amp. This can damage the components inside your amp, so it’s important to prevent condensation from forming. To prevent condensation, gradually warm up your amp by leaving it in a cool place for a few hours before bringing it into a warm environment.
Summer Maintenance
Summer Maintenance
Summer is a great time to be on tour, but the heat and humidity can take a toll on your amp. Here are a few tips to help protect your amp from the elements:
- Keep your amp out of the sun. The sun’s UV rays can damage the finish of your amp and cause the components inside to overheat.
- If you’re playing outdoors, try to keep your amp in the shade. If you can’t find a shady spot, use a sunshade to protect your amp from the sun.
- Don’t leave your amp in a hot car. The temperature inside a car can quickly rise to dangerous levels, even on a mild day. If you need to leave your amp in the car, be sure to crack the windows to allow for ventilation.
- Keep your amp dry. Humidity can damage the components inside your amp, so it’s important to keep it dry. If you’re playing in a humid environment, try to keep your amp in a dry place. You can also use a dehumidifier to remove moisture from the air.
By following these tips, you can help to protect your amp from the heat and humidity of summer and keep it running smoothly all season long.
Winter Maintenance
Winter Maintenance
Winter can be a tough time for your amp. The cold temperatures, condensation, and potential freezing conditions can all take a toll on your amp. Here are a few tips to help you prepare your amp for winter:
- Keep your amp warm. Cold temperatures can damage the components inside your amp, so it’s important to keep it warm. If you’re playing outdoors, try to keep your amp in a warm place. You can also use a heater to keep your amp warm.
- Prevent condensation. When you bring your amp from a cold environment into a warm environment, condensation can form on the inside of the amp. This can damage the components inside your amp, so it’s important to prevent condensation from forming. To prevent condensation, gradually warm up your amp by leaving it in a cool place for a few hours before bringing it into a warm environment.
- Protect your amp from freezing. If you’re playing in a cold environment, it’s important to protect your amp from freezing. Freezing temperatures can damage the components inside your amp, so it’s important to keep it warm. You can use a heater to keep your amp warm, or you can store it in a warm place.
By following these tips, you can help to protect your amp from the cold temperatures, condensation, and potential freezing conditions of winter and keep it running smoothly all season long.
5. Additional Tips for Amp Care and Troubleshooting
Additional Tips for Amp Care and Troubleshooting
In addition to the regular maintenance tasks outlined in this guide, there are a few additional tips that you can follow to help extend the lifespan of your amp and troubleshoot common problems:
- Handle your amp with care. Amps are delicate pieces of equipment, so it’s important to handle them with care. Avoid dropping or bumping your amp, and be careful not to spill liquids on it.
- Use a surge protector. A surge protector can help to protect your amp from damage caused by power surges.
- Get your amp serviced regularly. Even if your amp is in good condition, it’s a good idea to have it serviced by a qualified technician once a year. This will help to identify and fix any potential problems before they become major issues.
Troubleshooting Common Amp Problems
If you’re experiencing problems with your amp, there are a few things that you can do to troubleshoot the problem:
- Check the cables. Make sure that all of the cables are securely plugged in. Loose or damaged cables can cause a variety of problems, including no sound, intermittent sound, or distorted sound.
- Check the input and output jacks. Make sure that the input and output jacks are clean and free of debris. Dirty or damaged jacks can cause a variety of problems, including no sound, intermittent sound, or distorted sound.
- Check the power supply. Make sure that the power supply is working properly. A faulty power supply can cause a variety of problems, including no sound, intermittent sound, or distorted sound.
- Check the fuses. If your amp has fuses, check to see if they have blown. Blown fuses can cause a variety of problems, including no sound, intermittent sound, or distorted sound.
If you’re still having problems with your amp after troubleshooting the problem yourself, it’s best to take it to a qualified technician for repair.
Recognizing and Responding to Warning Signs
Recognizing and Responding to Warning Signs
It’s important to be aware of the common signs of amp problems so that you can respond appropriately and prevent further damage. Here are a few things to look for:
- No sound. If your amp is not producing any sound, it could be a sign of a problem with the power supply, the input or output jacks, or the amplifier itself. Check the cables and jacks to make sure that they are securely connected. If the problem persists, you may need to take your amp to a qualified technician for repair.
- Intermittent sound. If your amp is producing intermittent sound, it could be a sign of a problem with the cables, the jacks, or the amplifier itself. Check the cables and jacks to make sure that they are securely connected. If the problem persists, you may need to take your amp to a qualified technician for repair.
- Distorted sound. If your amp is producing distorted sound, it could be a sign of a problem with the input or output jacks, or the amplifier itself. Check the cables and jacks to make sure that they are securely connected. If the problem persists, you may need to take your amp to a qualified technician for repair.
- Loud humming or buzzing. If your amp is producing a loud humming or buzzing sound, it could be a sign of a problem with the power supply or the grounding. Check the power cable to make sure that it is securely plugged into a grounded outlet. If the problem persists, you may need to take your amp to a qualified technician for repair.
If you notice any of these warning signs, it’s important to take action immediately to prevent further damage to your amp. By being aware of the common signs of amp problems and responding appropriately, you can help to keep your amp running smoothly for years to come.
DIY Amp Repairs vs. Professional Service
DIY Amp Repairs vs. Professional Service
If your amp is experiencing problems, you may be wondering whether to attempt DIY repairs or seek professional assistance. Here are a few factors to consider when making your decision:
Your skill level. If you are comfortable working with electronics and have some experience with amp repair, you may be able to successfully complete DIY repairs. However, if you are not comfortable working with electronics or have no experience with amp repair, it is best to seek professional assistance. The severity of the problem. If the problem with your amp is minor, such as a loose connection or a blown fuse, you may be able to fix it yourself. However, if the problem is more serious, such as a blown power supply or a damaged amplifier, it is best to seek professional assistance. The cost of repairs. DIY repairs can be less expensive than professional repairs. However, if you do not have the necessary skills or experience, you may end up causing more damage to your amp and increasing the cost of repairs.
If you are unsure whether to attempt DIY repairs or seek professional assistance, it is always best to err on the side of caution and seek professional assistance. A qualified technician will be able to diagnose the problem with your amp and recommend the best course of action.
Recommended Tools and Resources
Recommended Tools and Resources
Here is a list of essential tools and resources for amp care and maintenance:
- Tools:
- Screwdriver set
- Nut driver set
- Soldering iron and solder
- Multimeter
- Vacuum cleaner
- Resources:
These tools and resources will help you to keep your amp in good condition and troubleshoot any problems that may arise.
Quiz
1. Which of the following is NOT a benefit of regular amp maintenance? (a) Preventing malfunctions and breakdowns (b) Maintaining optimal sound quality (c) Extending the lifespan of your amp (d) Making your amp louder
2. True or False: You should always use harsh chemicals or cleaners to clean the exterior of your amp. (a) True (b) False
3. What is the most important thing to look for when visually inspecting your amp? (a) Loose wires (b) Frayed cables (c) Dented corners (d) Scratches
4. True or False: It is okay to leave your amp in a hot car on a mild day. (a) True (b) False
5. What is the best way to prevent condensation from forming on your amp? (a) Gradually warm up your amp before bringing it into a warm environment (b) Leave your amp in a cold environment for several hours before bringing it into a warm environment (c) Use a dehumidifier to remove moisture from the air (d) All of the above
Answer Key
- (d) Making your amp louder
- (b) False
- (a) Loose wires
- (b) False
- (d) All of the above